Trimble R12: Sending Corrections via SIM Card
GNSS SIM Correction Procedure
Tested on:
• Trimble R12 firmware v6.13
• Trimble Access v2021.20
• Telstra Business SIM Card
• Trimble TSC7
• W10
Preparation:
- R10/12 with base configuration updated to latest firmware via TIM or WEBGUI
- Telstra SIM Card with extranet APN to enable public IP
- TSC7 with latest Trimble Access via Trimble Installation Manager
- Configuration files for WEBGUI and Trimble Access

- Use of a laptop is recommended
- Experience with Trimble WEBGUI and NTRIP is recommended
1. DDNS Setup
As a static IP is not used with the SIM in this workflow it is recommended to use a DDNS for ease of signing into the NTRIP. That being said it does introduce more variables and if connection issues are experienced disable it. R12 currently supports four DDNS providers as per the WebGUI.
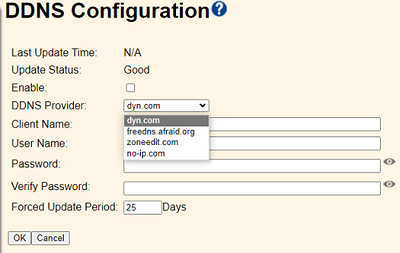
For this configuration we will use no-ip.com as it is easy to setup and allows a free service for testing. Go to no-ip.com, sign up and then sign in.
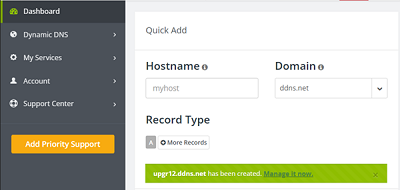
On the dashboard go to quick add and enter a hostname, if the one you have selected is unavailable it will prompt for another. Once it has been accepted it will say it has been created.
It’s recommended to add a username to your hostname for connection security. This can be done by going to Account Info and adding it.

The hostname, username and password are required for the R12. For simplicity in this configuration, we have upgr12.ddns.net, upgr12 and upgr12. Your details will be different, these are temporary and only for demonstration purposes.
2. Inserting Battery and SIM
The SIM will need the telstra.extranet APN to enable public IP as mentioned in preparation. You will need a complete 3 in 1 SIM card template to fit the receiver.

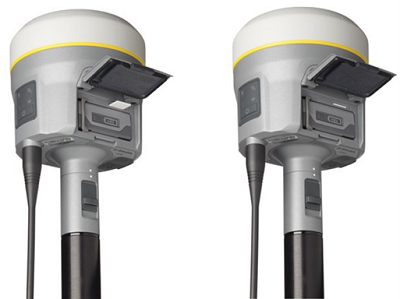
Insert the SIM card with the contacts facing upward, as indicated by the icon next to the SIM card slot. Insert the battery and power on.
3. WebGUI Connection via PC
Turn on the receiver, connect to its WiFi (eg GNSS 0907) and enter the WebGUI via a browser on IP 192.168.142.1. Login using administrator credentials.
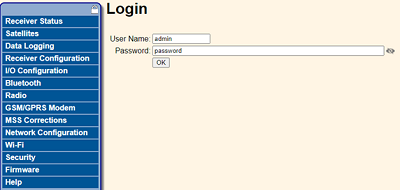
If you have lost or forgotten these, you can reset the receiver to factory by holding the power for 30 seconds as per the user manual. This will default to the above login and you will then be prompted to change it.
4. WebGUI Settings – Import Clone File
A clone file has been made to simplify this workflow. You can either adopt and modify as required or manually enter details as per step 5. Go to Receiver Configuration/Application Files and select as pictured below:
- Enter an missing override password
- Clone file is attached at start of document. Copy and paste the XML to your laptop
- Select, rename and press OK
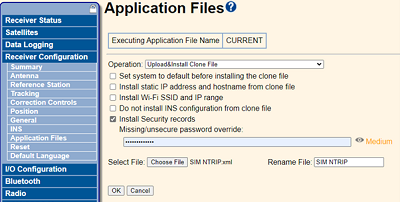
Go to Receiver Configuration/Reset/Reboot Receiver to make these changes effective
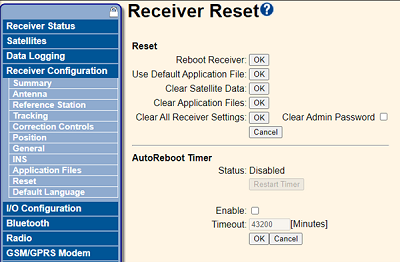
5. WebGUI Settings – Check and Modify
Reconnect to the WebGUI as per step 3 to check and modify the below settings. The admin password now defaults to HLTrimbleUser which may be changed later.
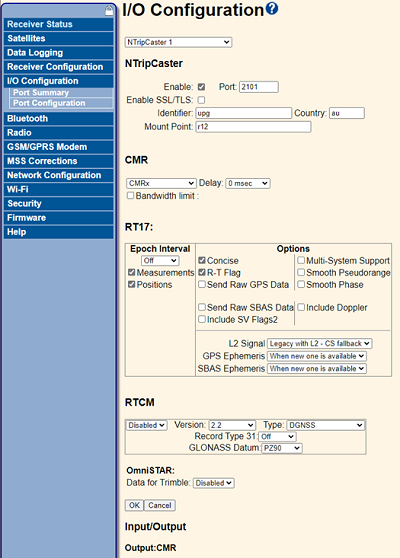
I/O Configuration/Port Configuration:
Select the drop down to NTripCaster1 and check the NTripCaster section is enabled; port entered; id, country and mount point entered. In this configuration only CMRx is enabled to optimise use between Trimble receivers, RTCMv3 may be used instead or additionally to support third-party receivers. Take care when enabling both formats as this may introduce bandwidth issues.
GSM/GPRS Modem/Configuration
Tick the enabled box and enter telstra.extranet as the APN, this enables corrections to be published to a public IP address.

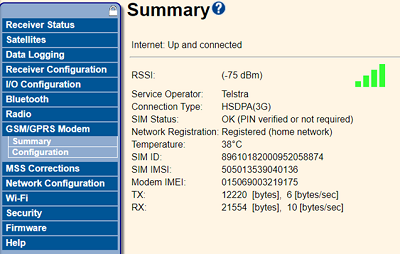
GSM/GPRS Modem/Summary
Check the internet is up and connected. The closer the RSSI is to zero the stronger the signal, if you have weak internet reception move the receiver. The TX and RX values over zero bytes indicate data movement.
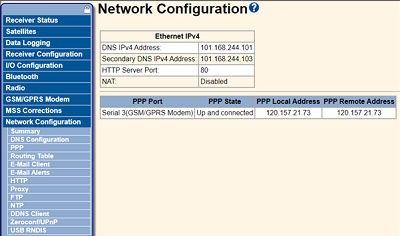
Network Configuration/Summary
Take note of PPP Remote Address. The IP should be in the 100.x.x.x range to indicate APN set correctly and is a public IP. If you have issues routing through the DDNS you can use this IP instead later. You can also use this IP to connect remotely over internet if you need to check settings.
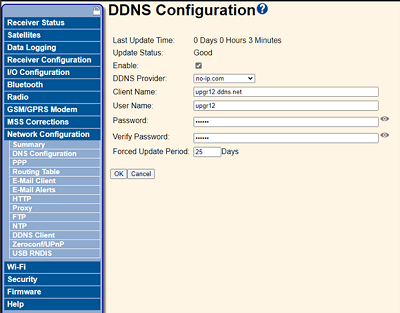
Network Configuration/DDNS Client
Enter DDNS details created in step 1. This information is not included in the clone file as it is optional to use and your details will differ. Tick the enable box, check the update status is good and the last update time populates.
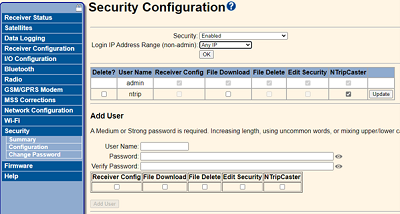
Security/ Configuration
The clone file will add an ntrip username of the same password which only allows NTRIP use. It will also make the admin password HLTrimbleUser, either of these can be changed if it’s required. Add users with different privileges at your discretion, NTripCaster is the only feature required here.
6. Trimble Access – Settings/ Connections
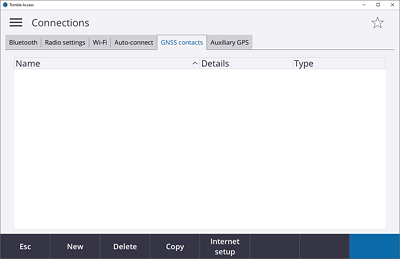
On the TSC7 make sure you have a SIM card installed or have an WiFi internet hotspot connected, you can use the Internet setup soft key to configure this.
Create a GNSS Contact using the New soft key
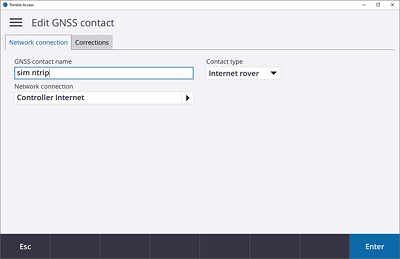
On the Network connection tab, name the GNSS Contact and select as below. A receiver internet connection is possible if the rover receiver has a sim modem. This workflow will route the internet connection via the TSC7
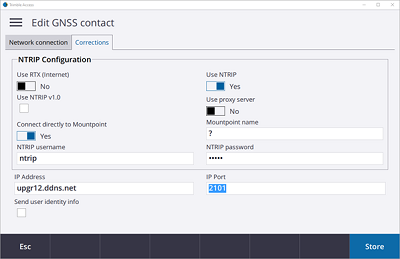
On the Corrections tab configure as below and store:
- Connecting directly to the Mountpoint is optional
- Enter your NTRIP username, password, mountpoint and IP Port as specified in step 5 from the WebGUI/Security/Configuration.
- If you configured a DDNS enter the Client Name in step 1 or 5 into the IP Address
- If not use the PPP Remote Address from step 5 eg 120.157.21.73.
- You may have to check in the WebGUI if this has changed due to being a dynamic IP
7. Trimble Access – Import Styles File
Copy the .sty file from the start of this document into the System Files folder. The Path is similar to \Trimble\Trimble Access 2021.20\Trimble Data\System Files. This style has been provided for ease of workflow but must be checked.
Settings/Survey Styles
- Base and Rover Options have Survey Type = RTK and Broadcast Format = CMRx, adjust your Antenna details as per your receiver type.
- GNSS Signal Tracking has been set to GPS and GLONASS only to avoid any bandwidth issues, once you have confidence you can turn on other constellations as required.
- The base data link has been nominated as Radio/Receiver internal which can be used in conjunction with NTRIP. If not required simply remove the radio antenna.
- Rover data link must be configured as an Internet connection selecting the GNSS contact created in step 6.

Press Store to save the changes.
8. Trimble Access – Start Base
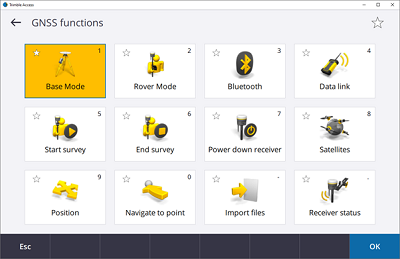
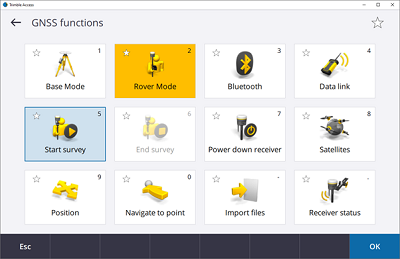
On the TSC7 open or create a job in the system to be worked in e.g. GDA2020. Go to Instrument/ GNSS Functions and change the setting to Base Mode and Start Survey using the style file created.
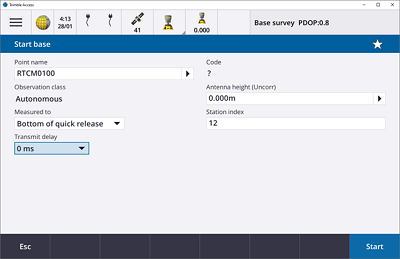
Key in or select the base coordinate to be used, the antenna height and then press start.
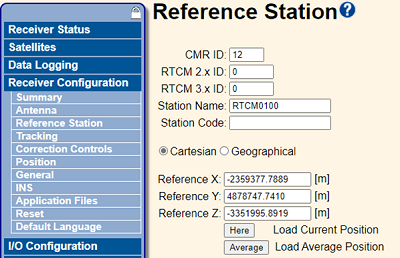
On the laptop WebGUI/ Receiver Configuration/ Reference Station the CMR ID and position will be adopted. Alternatively, the position can be entered as below rather than using Trimble Access
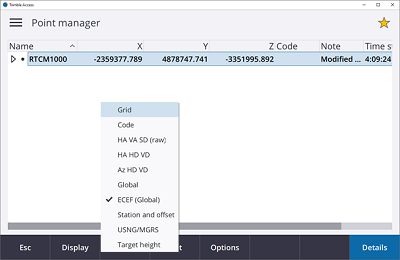
This position is best entered in XYZ (ECEF) which can be viewed in Trimble Access Point Manager by toggling the Display button/
WebGUI/ I/O Configuration/Port Summary
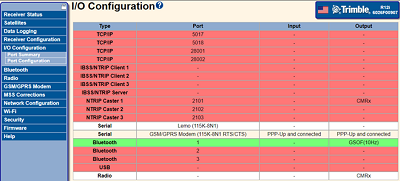
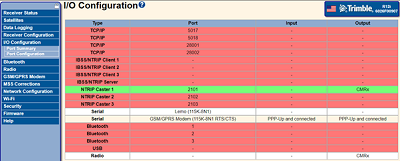
The WebGUI/ I/O Configuration/ Port Summary should now look like the below. Corrections are outputting from Serial Modem (PPP), NTRIP Caster 1 (CMRx), Radio CMRx
9. Trimble Access – Rover Setup
In GNSS Functions connect to the rover and start survey using the same styles file
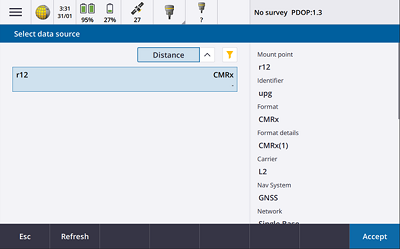
Once the link is established you will see a data source summary if not connecting directly to mountpoint. You can check the mount point, identifier and format before accepting.
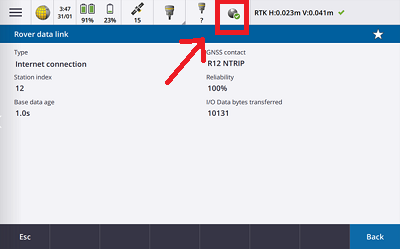
Once connected tap on the data link button and check reliability, index and base age.
10. Basic Troubleshooting
Check the Base Connection via WebGUI/I/O Configuration/Port Summary. When a rover is connected the NTRIP Caster it will highlight green as below.
- Disable DDNS and use the IPv4 Remote Address instead
- Check the SIM card – Make sure APN is enabled, the SIM card is inserted correctly, modem has been enabled, and the internet reception is strong enough.
- TSC7/ Trimble Access – Check the internet connection, style settings (step 7), and that you are using the correct version
- WebGUI – Check all configuration settings match those in step 5
Please don’t hesitate to contact our support team on 1800 800 874 for any other support issues and queries.

